Coyote 3 E-Stim Base Unit From DG-Lab
Coyote 3 E-Stim Base Unit From DG-Lab
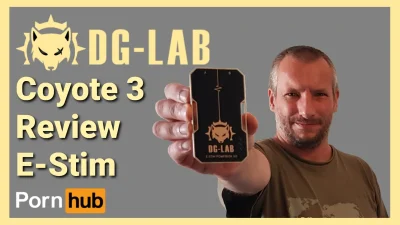
Hi guys and welcome back to another new toy blog. In today’s episode I’m going to be showing you the new Coyote 3 E-Stim from DG Lab find out everything you need to know hit that like And subscribe button and let’s get into the blog.
Hi guys I’m UKDAZZZ as always and as I said at the start of the blog I will be showing you the new Coyote 3 from DG Lab so you might be wondering.

What is E-Stim?
Well this little box delivers a small but safe electrical current that makes your muscles relax and contract involuntary so what I’m going to do in today’s blog is give you an unboxing blog of the Coyote 3 then what I’m going to do is show you how to use it without connecting it to the app and whilst I’m at it I’m also going to show you it working so there is absolutely loads to show you in this blog so I’m going to shut up and let you watch the unboxing blog.
Unboxing Coyote 3
Okay as always let’s open the box and show you what’s inside on the outside packaging there is no labels from DG Labs however there is a a large Customs label and on the Box on the inside there is also No Labels although it has been through customs and as you’ll see that the box is a little bit battered once we get into the box and move the packaging out the way you’ll see DG Lab has sent me absolutely loads of attachments
I will be going through all the attachments and how to use them in upcoming blogs in this episode I am only going to concentrate on the Coyote 3 E-Stim base unit and I’ll be showing you how to use it straight out the box without connecting it to an app although that is one of the key features for the Coyote 3 as you can see there are going to be lots of blogs coming up on this toy.

What’s Inside The Coyote 3 Box
Let’s move all these boxes out the way and get on with showing you the base unit if we open the top of the box up the first thing we’ll see is two instruction manuals one in Chinese and one in English.
Hopefully Google’s translation of this blog will be good enough for people to follow along in other languages as you can see this is clearly the Chinese instruction manual the other one underneath is the one in English much easier to read and see how to use the toy anyway no need to read the instruction manual this blog will cover everything.
What Do You Get When You Buy The Coyote 3
So let’s get it out the way and show you the toy itself inside this lever case is your Coyote 3 all DG Lab attachments come inside their own lever case like this one you can identify what’s inside each of the cases as it has its own unique icon on the outside the exception for this is the loops and the stim pads so let’s open it up and show you what you get when you buy the Coyote 3.
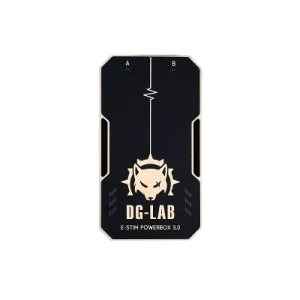
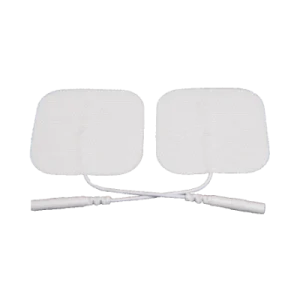
In the bottom half is the Coyote 3 is thin base unit what you will notice when you take it out the case is it is extremely light it only weighs 80g so let’s put that aside for a second and show you what’s in the top half of the case don’t worry I will be coming back to it later in the video the first thing on top is two sets of E-Stim pads these are self-adhesive so they do stick to your skin.
I actually really like that they include these in the base unit so it gives you something to use when you buy the toy also included in the case is a strap to attach the E-Stim unit to the strap is a Velcro one so it can be attached to the person wearing it or yourself it means they don’t have to hold it and carry it.
How To Attach The Straps To The DG-Lab Coyote 3
To attach the straps to the Coyote 3 all you need to do is feed it through the two holes either side of the E-Stim unit so what else is included you do get a pair of 2.5 mm connecting cables this end plugs into the Coyote 3 base unit and the other end plugs into your E-Stim pads or your loops there is just a couple more things to show you inside the case one of those is the charging cable the Coyote 3 uses a USB-C charging cable.
Finally inside the case is the second set of connecting cables so there you have it that’s what you get when you buy the Coyote 3 E-Stim base unit from DG Lab if I have inspired you to buy one there is a link in the description below to my website where it’ll give you all the details on how to get one but before you Scuttle off and place your order I’m going to connect everything together and show you how the toy works I’m not going to show you how to connect the Coyote 3 to the app in this blog.
I’ll save that for another one so remember to hit the Subscribe button and notification Bell for when that’s released.
How To Connect Your E-Stim Coyote 3 To The ElectroPads
The way we’re going to use it today is as a standalone unit so the first thing I’m going to do is untangle the wires and get the east in pads ready to be connected once the cables have been unravelled plug the 2.5 mm connector cable into the base unit it is important that you do this before you turn the the Coyote 3 base unit on as it prevents shorts which can damage the base unit.
The other end of the cable has two connections each one plugs into one of the pads once both pads have been connected to the cables you’re ready to start sticking it to your skin with everything connected we’re now ready to turn on our base unit so I’m going to get everything out the way and show you how to do that to turn on your Coyote 3
How To Use Your Coyote 3
At the top of the toy there are two buttons you can use either of these buttons to turn on the toy all you need to do is push it the once you’ll know your Coyote 3 is switched on because the eyes will light up and so will the other lights on the base unit.
What Are Wave Forms?
The Coyote 3 has four different waveforms a waveform is similar to a vibrating toys pattern to change it all you need to do is Slide the button up or down as you can see on the base unit the lights do change colour when you select a different waveform
How To Use Use E-Stim Pads
So I’m going to stick on the E-Stim pads now to my arm and I’m going to show you the effect you do need both pads attached to your skin for the toy to work So you can’t just use it with one pad or one Loop.

Don’t throw away the plastic back in for the pads as you’ll need this later on once you’re finished with your pads stick them back on the back in once you’re done and it will stop them from collecting dust and hair so that they last longer
How To Start Your Coyote 3
Now that the pads are stuck on my arm we’re going to start our coyote 3 to start the toy all we need to do is push on the power button once for our toy to start.
How Do You Know Your Coyote 3 Is Working
You’ll know that the toys working because the eyes will start flashing you’ll also notice that in the top left hand hand side of the device underneath the letter A the light is flashing and this is flashing in line with the waveform every base unit starts off at zero so you won’t feel any effects at the moment the higher the intensity level the more you’ll feel the effects to add more intensity.
How To Increase The Coyote 3 Power
All you need to do is Slide the power button upwards in the same motion that you selected your waveform the button on the A side controls what’s plugged into that half of the toy and the B button controls whatever’s plugged into the other half and yes before you comment that is me making that mistake so I’m going to correct that now and start using the a button again all you need to do is Slide the button upwards to increase the intensity.
What Happens If With E-Stim Pads On Arm
Once I’ve turned it up enough you’ll notice my fingers are starting to contract involuntary to stop the base unit at any time all you need to do is push on one of the buttons the lights will stop flashing and remain constant to turn off the Coyote 3 all you need to do is hold down the power button remember if I have inspired you to buy the Coyote 3 there is a link in the description below to my website and remember to hit that like And subscribe button for future blogs on other attachments and for one just for the Coyote app.
Coyote 3 Description
So there you have it that’s what you get when you buy the coyote 3 E-Stim system from DG-Lab okay so here comes the boring bit the Coyote 3 weighs 80g it measures 100 mm from top to bottom 55 mm wide and the thickness is 14 mm and the battery can take anywhere up to 3 hours to charge.
As for how long the battery will last whilst it’s in use that’s up to you depending on how you use it but it does have 1,000 milliamp battery inside which is almost double what the Coyote 2 had now I’m going to be making lots of blogs on the Coyote 3 and that’s because I’ve got all the attachments and I think there was six in all plus there’s going to be blogs on how to connect the Coyote 3 to your mobile device your PC and how to use it Long Distance.
What’s Going To Be In Future Coyote 3 Blogs
Now at the time of recording this blog I have only used the pads and the loops I am actually going to be making a separate blog for the loops and the main reason for that is because it’s a little bit more content for me and makes you come back and watch another blog by the time I’ve released this blog.
I’ve probably used all of them already but if you do order yourself a Coyote 3 with the loops then get some lube this just prevents any heat spots and prickling
Coyote 3 Review
okay so what did I think of the Coyote 3 surprisingly good and that is exactly what I was hoping for I have used other E-Stim brands in the past and I was a bit sceptical because this is so small but surprisingly it really does Pack-a-Punch.
If you are a beginner or you’re thinking about buying a box this is your best value for money I think the power unit on its own is about 85 which is about $90 or £75 as I said I am making other videos so although I’m not giving a proper review today it is only because I’ve only just opened the box as I release each blog I will leave in a small section about the previous attachments use.
So in the next blog I will tell you a bit about how I’ve been using the pads
If I have been inspired you to buy a Coyote 3 there is a link in the description to my website Below on the page will be a link to Coyote to buy it direct this link is an affiliate link it doesn’t cost you any more to use but it does give me a very small percentage of DG-Lab profits if you buy something.
If you have got any questions feel free to drop them in the comments box below on my blog or come and find me on social media all those links are also listed in the description below that’s it for this blog guys. Thanks for watching don’t forget to hit that like And subscribe button and notification Bell for future blogs.
until next time
peace out


