How To Use Coyote 3 DG-Lab Pawprints
How To Use Coyote 3 DG-Lab Pawprints
Hi guys and welcome back to another Coyote 3 blog in today’s blog I’m going to be showing you how to use the DG-Lab Pawprints so there is absolutely loads to cover in this blog so let’s get into it
Hi guys I’m UKDAZZZ as always and as I said at the start of the blog I will be telling you how to use the DG-Lab Coyote 3 Pawprints if you haven’t heard of the DG-Lab Pawprints before they’re basically like a remote control trigger for your Coyote 3 E-Stim base unit and they’re mostly used to play control games within the DG-Lab app
Now there is absolutely loads to show you in today’s blog to start off with I’ll give you a short unboxing video on these little bad boys I’ll also be showing you how to download and use the DG-Lab app for your Pawprints and at the end I’ll be giving you a quick review.
So enough waffling from me let’s get into the unboxing blog.
What You Get With DG-Lab Pawprints
Okay so let’s unbox the Pawprints and show you what you get inside the first thing you’ll see is the instruction manuals one side is in Chinese the other side is in English.
So let’s get the instruction manual out of the way and show you what’s inside the DG-Lab Pawprints box all DG-Lab accessories come in these cases the only two exceptions to that is the pads and the loops.
In the bottom half of the box you can see we’ve got our two DG-Lab Pawprints and inside the top half of the box is our accessories for the Pawprints inside we get two nylon straps don’t worry I’ll explain how to use these later in the blog.
We also get the USB-C charging cable for both of the Pawprints and just before anyone asks you can use a regular USB-C charging cable to charge your Pawprints this is just a super cool one that charges both at the same time.
You also get two plastic backings for the Pawprints again I’ll tell you more about these later in the video and finally in the box there are two clips these also attached to the back of the Pawprints we’re now going to take a closer look at the Pawprints themselves on each of the Pawprints.
There are three light on the shoulders and there are also two lights on the eyes on the back you’ll find your charging port and you’ll find a small on/off switch give this one quick firm push and it will turn your pull print on and you’ll know your Pawprints are switched on as the lights on the eyes will be lit up.
How To Use The DG-Lab Pawprints Attachments
Now you might be wondering why there are two grooves either side of the Pawprints and this is where you attach your nylon straps to attach the clips to the back of the Pawprints all you need to do is push them into place as you can see there are grooves that they fit into and they just clip in.
The plastic backing is also just as easy to connect just line it up and click it in the clips and the backings can be fixed to surfaces and that’s why they’ve got screw holes in the back if you are fixing them to a surface permanently they can be a little tricky to get off so be mindful on where you’re going to put them.
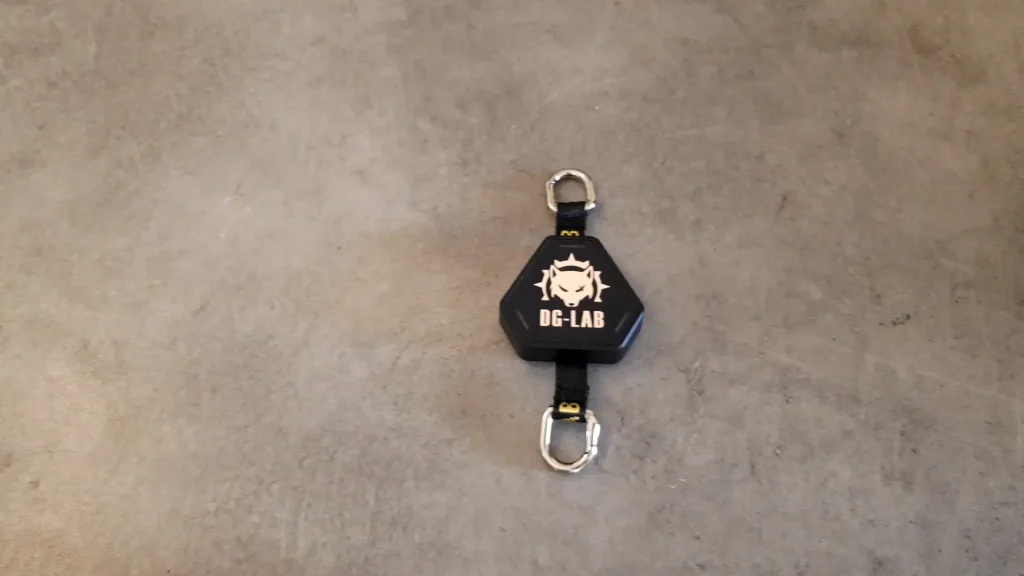
The clip is relatively easy to take off all you do is give it a squeeze the backing on the other hand can be a little bit more tricky and it needs to be taken off from the base end once fixed you may need a blunt knife to be able to slide into the back of it just to release the clasp.
To attach the straps the easiest way I’ve found to do it is by squeezing them together and sliding them into the groove give them a small pull and they will open up inside the groove.
You’ll need to do this on both sides due to where the straps are positioned they now act as a trigger when pulled apart a tension created will trigger the button.
How To Pair The DG-Lab Pawprints With Coyote 3
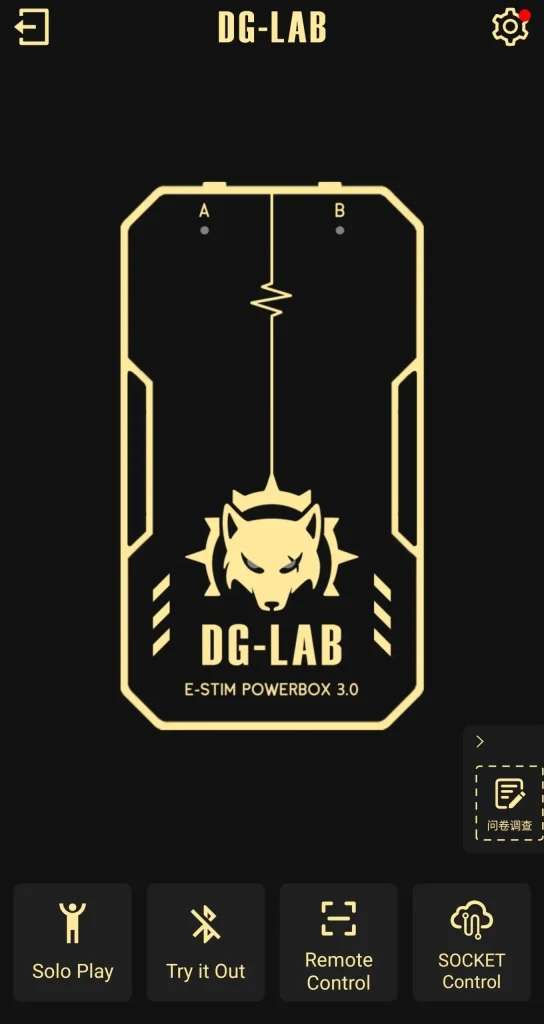
Okay so what we’re going to do next is get our Coyote 3 and our Pawprints ready to connect to our app you do have to make sure that you’ve got the DG-Lab app installed on your phone as the Pawprints won’t work without it if you want to see how to download and install the app onto your phone.
There is a blog in the here I’ll put a time stamp here so you can jump back to this part of the video once you finish watching it to connect your Pawprints make sure they’re switched on and make sure your Coyote 3 is also switched on.
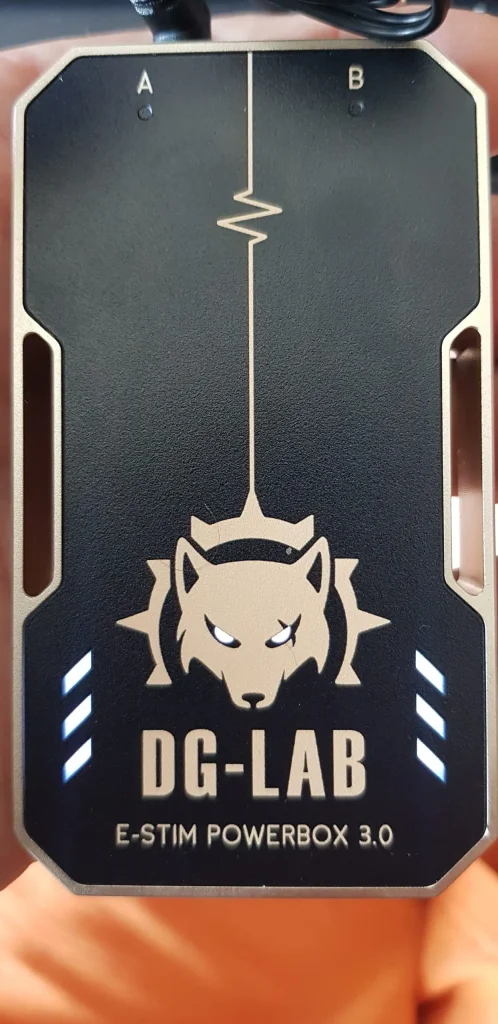
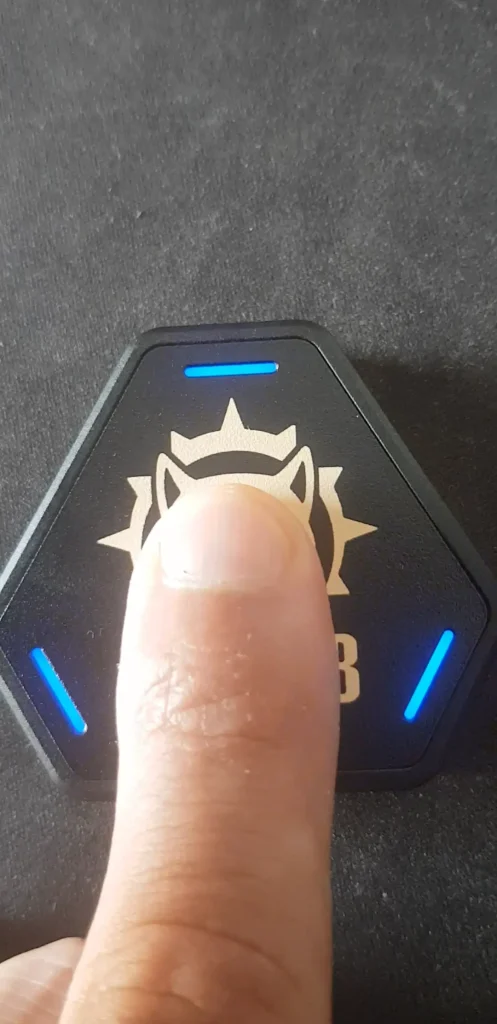
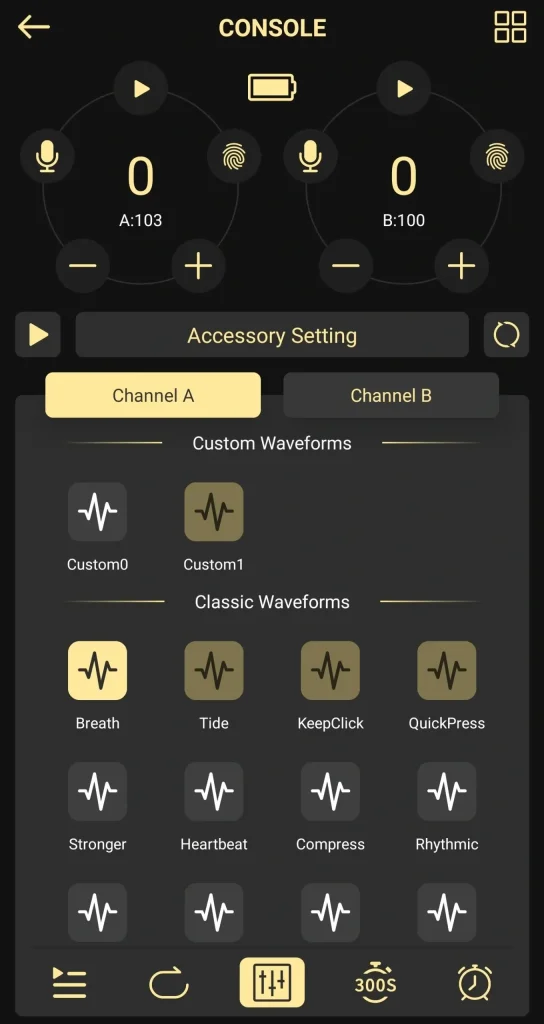
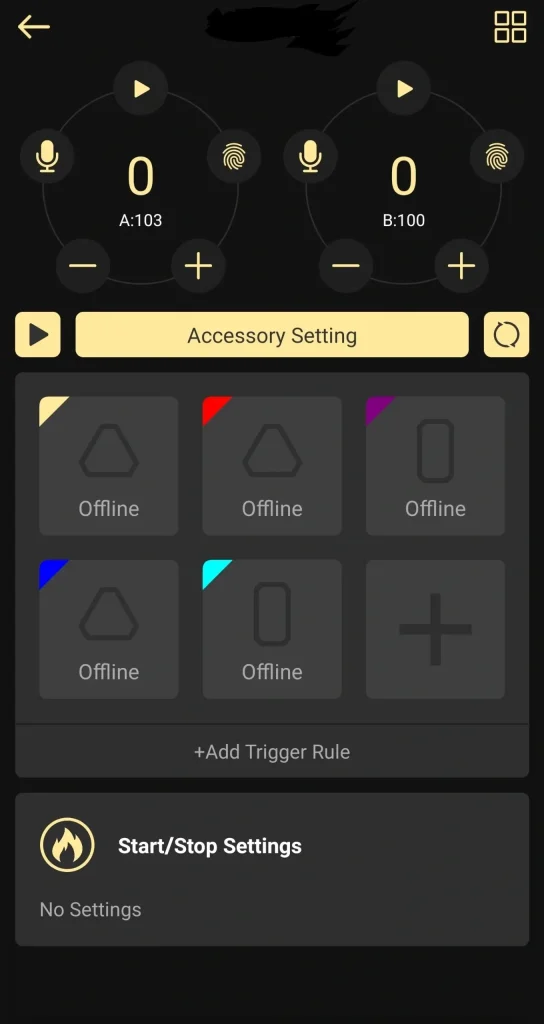
Now head over to the control panel on the DG-Lab app once there click on the accessory settings button to search for your Pawprint all you need to do is tap in this space here you’ll then see this message here which says to connect your Pawprint you must hold down on it until the lights start flashing from white to Blue so that’s exactly what we’re going to do.
Now I’m going to push down on the Pawprint until the lights start flashing whilst our finger is still on the button we’re going to head back over to the app quickly and we’re going to push the start scanning button after a quick scan it will say the pairing has been successful by pushing continue you’ll be taken back to the main screen screen where you can start pairing another Pawprint.
This time all you need to do is push on the plus button next to your paired Pawprint then just repeat the same process I’m only going to be connecting one so we’re going to go back to the accessories page where we can test if our Pawprint has been connected successfully.
DG-Lab Pawprint Settings
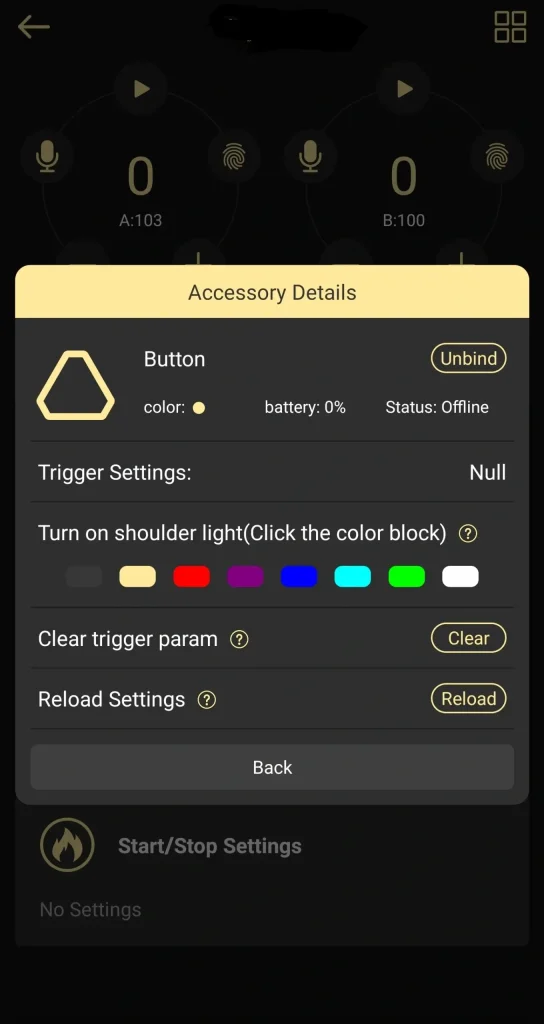
We can do that by clicking on a connected Pawprint as you can see along the top row we can see the battery life of the Pawprint and it also says it’s online you can also change the colour of the shoulder lights on the Pawprint and I’m going to show you what that looks like.
Now as you can see on the Pawprint there are no colours displayed on the shoulders but if I click on the red button on the app the lights will turn red and I can go through each Pawprint and change the colour of each one or I can make them all the same remember if the lights are switched on there may be a slight decline in the battery life
To turn the lights off again just push the black button on the app
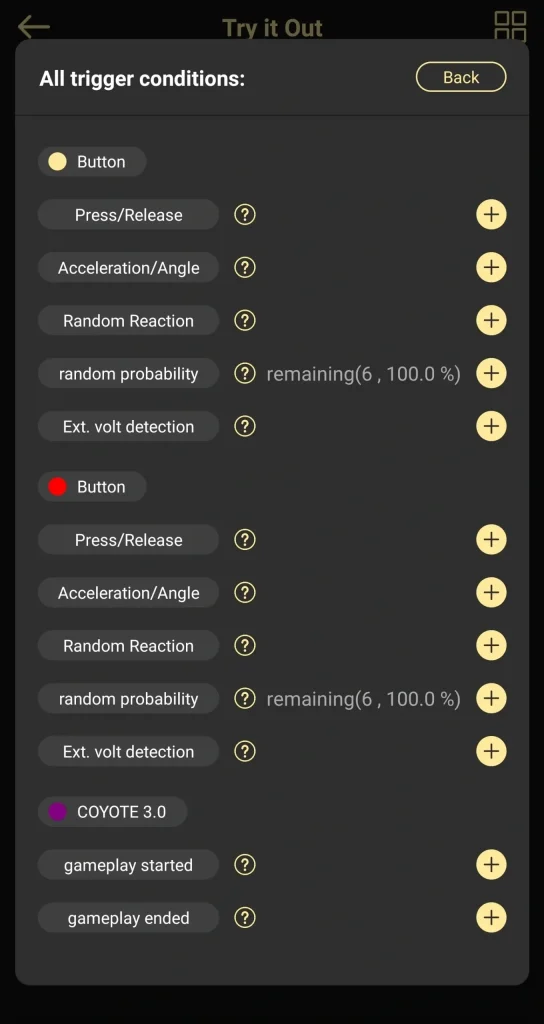
Now that we know we have our Pawprints connected we can now go and set up our triggers. To do that we’re going to need to click on the add trigger rule button you will have to set the rules up before your Pawprint will start working at the moment there are no conditions.
How To Set-Up A DG-Lab Game
To add one all you need to do is click on the plus condition button in the top right hand side so what I’m going to do now is go through these one by one hopefully Google’s good enough to translate this for other languages each of the following options will trigger your Coyote 3.
DG-Lab Pawprint Press And Release Game
The first is press and release this means if the Pawprint button is pushed or released it will trigger your Coyote 3 by clicking on the plus button next to press and release it will bring up a menu if you want to change it from press to release all you need to do is clicking the button on the top right hand side.
Setting Up Pawprint Trigger Results In Coyote 3 App
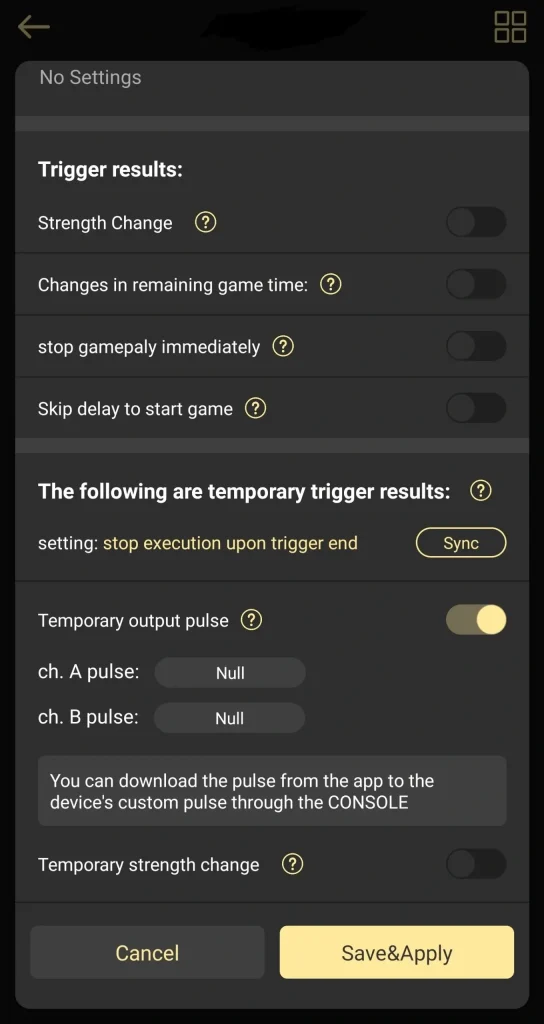
Now you need to set your trigger results these are the same options for each of the conditions so I’m only going to try and cover them the once in this blog so if we click on the toggle next to strength changer will be given two bars and each bar represents each channel the way it’s currently set is every time the button is triggered one level of intensity is added to the overall stimulation.
Each time it’s triggered it goes up by one so if our base is zero if we push it 10 times the intensity goes up by 10 we can slide this bar up so it says plus 2, 3, 10 whatever you like and again whatever number is displayed is added to the overall stimulation level the next toggle down is changes in remaining game time and the way.
I believe this works is that every time the Pawprint is triggered it either deducts or adds more time on the next toggle down is is stop gameplay immediately this one is fairly self-explanatory when the Pawprint is triggered it will immediately stop the device and the final option in the bottom is Skip delay to start game if a delay has been set this overrides it.
DG-Lab Pawprint Acceleration And Motion Game
Okay so that’s everything we need to know about trigger results we’re going to go back up to the top of the page now and go back to our conditions we’ve already covered press and release so the next one we’re going to cover is acceleration and angle this is a very cool feature as there are motion sensors inside the Pawprints that will activate your Coyote 3 when triggered.
So I’m going to select that and show you the settings we have two options here as you can see in the top right hand side we’re currently looking at mode one which is the acceleration mode now if you want to set a minimum movement level then slide the bar to the right of the screen if you want to set a maximum movement level then click on the button.
Again all you need to do is Slide the bar to the right of the screen as long as the person keep keeps moving at the right pace they won’t get zapped to make the Pawprints angle sensitive click on the mode one button as you can see you can adjust the 3 axis of the Pawprint any deviation outside of these set parameters will result in your Coyote 3 being triggered.
DG-Lab Pawprint Random Reaction Game
In the advanced settings you can also adjust the timing of how long that trigger lasts for the next condition in the menu is random reaction the way this game works is a random green light will display on your Pawprint the user then has a set amount of time to react and push the Pawprint.
If they fail to react in time they will be shocked the top bar on screen lets you adjust the amount of random time at the moment it’s set from anywhere between 1 and 10 seconds Slide the bars to the right of the screen and will adjust the timing.
The bar underneath is the reaction time for the user as you can see at the moment they only have 1 second to react and push the Pawprint by sliding the bar to the right of the screen will give them more reaction time.
DG-Lab Random Probability Game
The next game on the list is random probability.
The way I understand this to work is that it’s a bit like Russian Roulette each button is assigned a percentage of How likely it is to trigger your Coyote 3 this is not a fixed percentage it’s just a range that it can work in the top bar slid to the right will adjust the percentage and the slide bar underneath adjusts the cool down time.
DG-Lab External Voltage Detector Game
The final game on the list is external voltage detection.
Now I’m not going to lie I don’t fully understand how this one works but if you do please feel free to drop a message in the comments box below and let us all know how to use it.
DG-Lab Game Start Stop Settings
Okay so there is one final thing to show you on the accessory page that you need to change before you start your games and that’s the start stop settings at the bottom the first toggle on the top row is delayed start by turning this setting on it gives a delay to the start time of the game.
The next Toggle down is basic strength once switched on it gives you the ability to choose each Channel’s basic power setting to make this make more sense this is the stimulation level for when your Pawprint is not being triggered to adjust these levels all you need to do is Slide the bar to the right of the screen.
The next toggle down is background pulse and to put this as simple as possible this is what waveform is being used when the trigger hasn’t been pushed on your Pawprint kind of like the idling time as you can see both channels are set to built in one which refers to the waveforms.
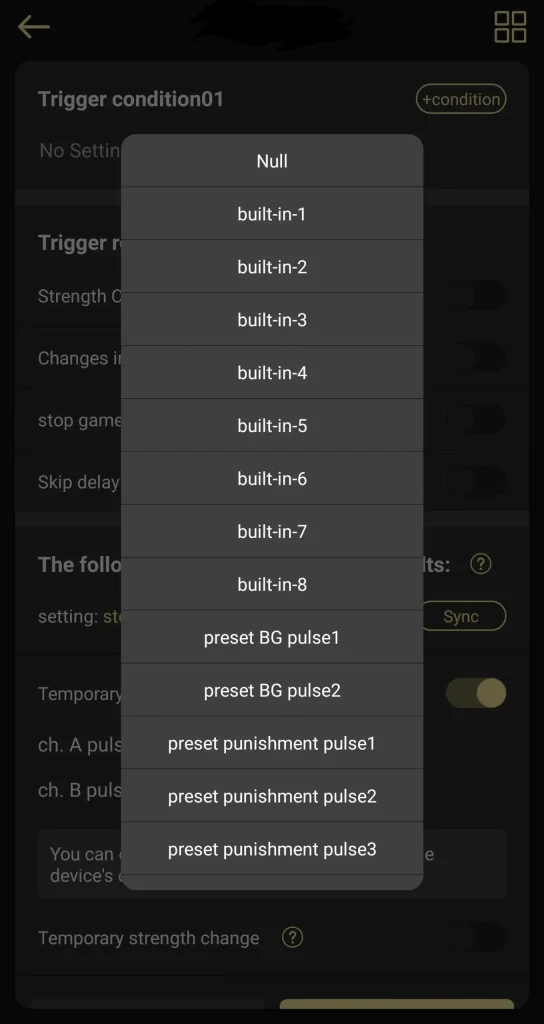
Whichever Port you have your attachment plugged into change the opposite channel to null so I have my E-Stim attachment plugged into port a and I’m going to change B to null now I’m going to click on the menu for channel a and I’m going to select one of the waveforms.
Obviously if you have an attachment plugged into both channels you can set each waveform and the opposite Channel doesn’t have to be null the next Toggle down is time stop of game and this is obviously how long the game lasts for this can either be a fixed time or it can be a random time.
Again you can change this and to do that you can slide the bar to the right of the screen the next toggle down is roller cannot adjust strength once activated this takes away the ability of the user to change the strength of the E-Stim device.
Finally on the list is long press roller cannot shut down again this stops the user from being able to stop the game once you have added all your settings make sure to click on the save button so what I’m going to do now is clear all the settings and I’m going to set up the Pawprint so we can use it for one game this should show you how your Pawprint setting should look.
How To Start A DG-Lab Game
So like I said earlier the first thing we need to click on is add trigger Rule now we have to select our condition in the top right hand side of the screen and for this game example I’m going to select press and release I’m going to click on strength change and I’m going to leave these settings as they are and I’m going to scroll down to the bottom of the page and select the temporary trigger output.
From here I’m going to select the pulse once the Pawprint is triggered now all those have been set I’m going to click on the save and apply button now we’re going to need to scroll down slightly and set our start stop triggers and all I’m going to do here is change our starting strength all I need to do.
Now is click on the save button now all these settings have been filled out we’re ready to push on the play button in the left hand side of the screen our game has now started and every time we push our Pawprint you’ll notice that our stimulation strength will go up every time it’s pushed there is only one more thing to show you in this blog.
DG-Lab ACCY Configuration Settings
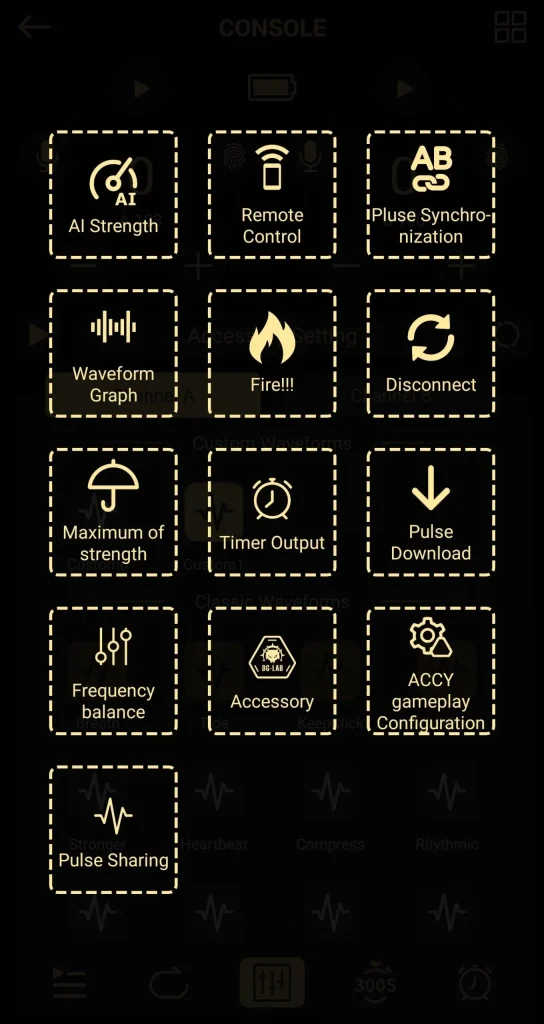
So I’m going to stop the game and to do that all you need to do is click on the pause button and from our control panel we’re going to click on the four squares in the top right hand corner of our screen and from here we’re going to click on the ACCY gameplay configuration button the first thing you can do in here is save your current gameplay settings click on the save current gameplay button and you’ll be asked to fill in a name for that game.
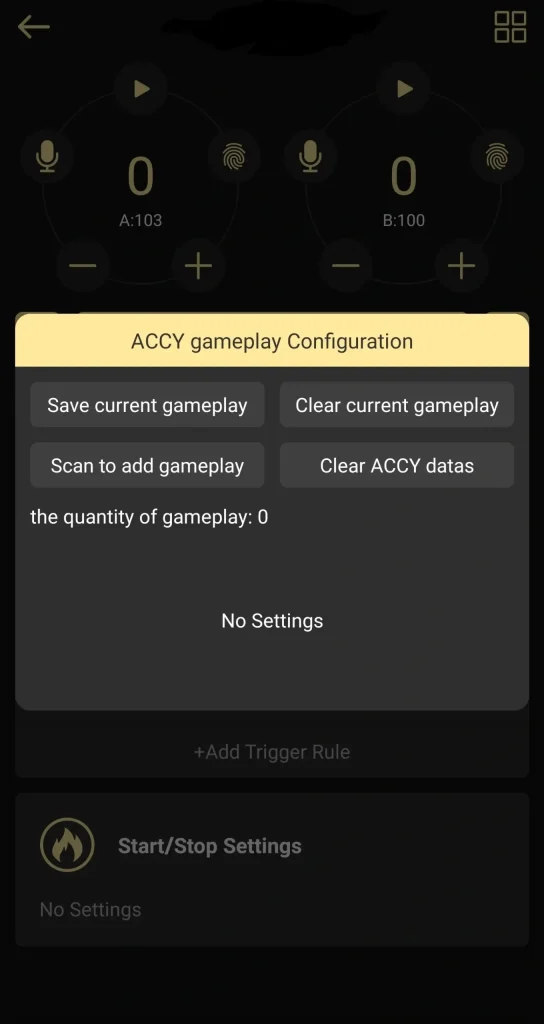
Once you’ve entered in your name click on the save button and it’ll be added to your save files you’ll be then given three options for that saved game the first option is to download it and the first reason you might want to download it is in case you accidentally clear the settings and the second reason is you may want to share it with someone talking of sharing it you may also want to create a QR code this QR code can be saved and it can be shared to other people.
All they need to do is scan the QR code and they’ll receive the settings to scan that barcode all we need to do is click on the scan to add gameplay button if we want to clear all the current gameplay all we need to do is click on the button and if you want to clear all the data all you need to do is click on the clear ACCY button.
If you would like to share your your gameplay settings with like-minded people I have set up a subreddit you can find a link for this subreddit on my website which is listed Here.
DG-Lab Pawprint Connected To Restraints
Now you know how to set up your Pawprints the final thing in this blog I’m going to show you is how to attach them to your restraints I will be making a follow-up blog just on the DG-Lab restraints one way you can connect your DG-Lab Pawprints is by clipping them onto the loops of the restraints you can do that with the straps providing by DG-Lab.
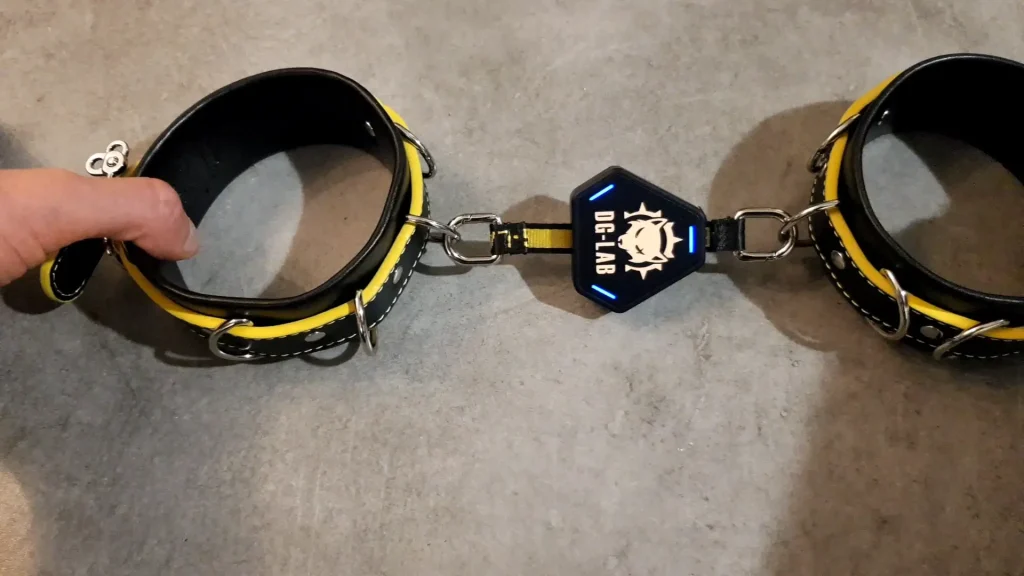
Once the straps are secured to the restraints you can then play the press and release Game the slightest bit of tension will activate the Pawprint which in turn will activate your Coyote 3 if the wearer pulls their hands or feet apart it will trigger the Coyote 3 also you can use the clips provided by DG-Labs to hold the Pawprints to the restraints with the Pawprints attached like this.
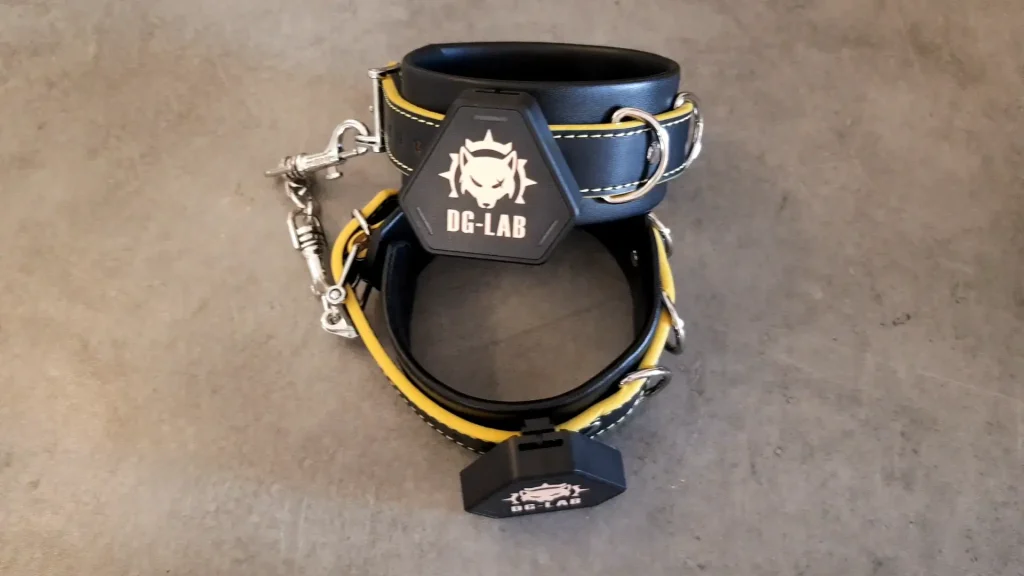
You could play the accelerate and angle game if you have found this blog useful so far please do hit that like And subscribe button and if you’ve been inspired to buy the Coyote 3 the DG-Lab Pawprints or restraints then there is a link in the description below to my website where you can buy them directly from DG-Lab.
So there you have it that’s what you get when you buy the DG-Lab Pawprints and you can see how easy they are to use.
DG-Lab Description
As always I like to give a quick description on everything I review so each Pawprint weighs 28 G and they measure 55 mm across and 15 mm thick each Pawprint takes 2 to 3 hours to charge and has a battery life of 20 to 40 minutes.
Now I think these are extremely cool little bits of Kit to add a totally different interactive element into gameplay is only going to be a good thing another really cool thing I like about these is you can have up to six of them connected at the same time.
How To Get Your DG-Lab Pawprints
If you want to get your hands on some DG-Lab Pawprints there is a link to my website in the description below on there you’ll find a direct link to DG-Lab’s website this link is affiliate link it doesn’t cost you any more to use but it does give me a very small percentage of DG-Lab profits if you choose to buy something.
If you have got any questions feel free to drop them in the comments box below on my blog or come and find me on social media all those links can also be found in the description below.
Don’t forget to hit that like And subscribe button and notification Bell for future blogs that’s it for this blog guys thanks for watching.
Until next time
Peace out


